Connect OpenVPN in DD-WRT
1. Enabling OpenVPN client in DD-WRT 2. Importing config to OpenVPN client in DD-WRT 3. Log of OpenVPN client in DD-WRT 4. Setting DNS in DD-WRTThis article is based on DD-WRT v3.0. Check the availability of OpenVPN client for the older versions of DD-WRT on the official site.
All actions described in the article have to execute in the web interface of DD-WRT only.
DD-WRT device has to have internet access.
1. Enabling OpenVPN client
Go to the tab Services -> VPN to enable OpenVPN client in DD-WRT. Ensuring that DD-WRT has OpenVPN client (subitem OpenVPN Client is existed) activate the client by choosing Enable in Start OpenVPN Client.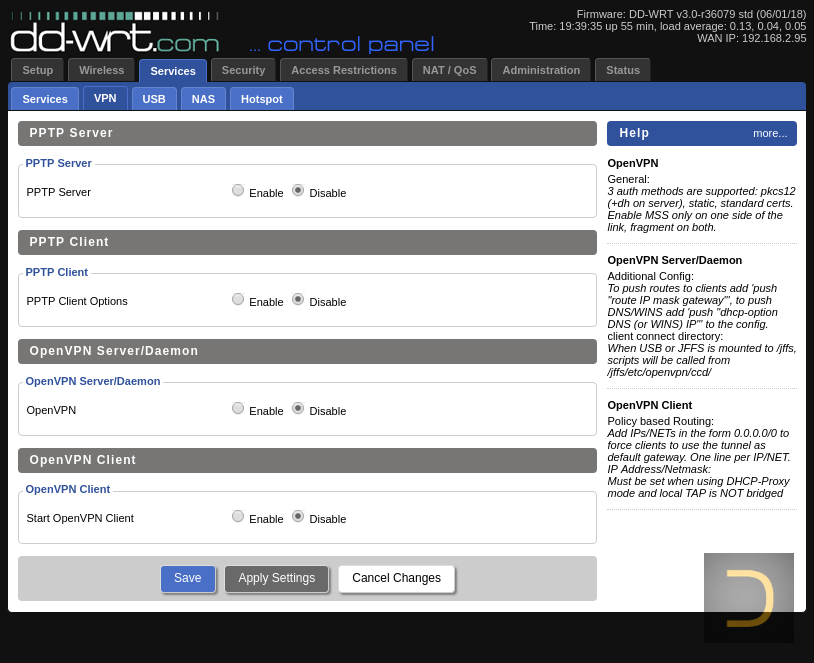
2. Importing config
It is necessary download OpenVPN config before the import. Follow the link of OpenVPN configs in a web browser and choose one in the folders single or double.It is possible download all OpenVPN configs in one zip, you can also download zip of the single chains only (SingleVPN) or zip of the double chains only (DoubleVPN). Don't forget to unzip it.
The form of OpenVPN client configuration will be appeared in the same tab (Services -> VPN) after the successful OpenVPN client enabling. Open the config file in a text editor (it is better to use WordPad in Windows) before the entering OpenVPN client form.
OpenVPN client in DD-WRT supports DeepWebVPN's RSA configs only.
RSA configs are OpenVPN config files with "RSA" prefix in a file name. ECC (Elliptic Curve Cryptography) configs are OpenVPN config files with "ECC" prefix in a file name. E.g.: SingleRSA_RU1.ovpn is RSA, DoubleECC_GB2_US2.ovpn is ECC.
In the config file opened in the text editor find the lines like in the example below.
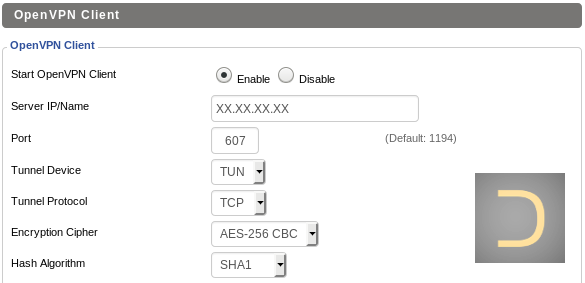
remote XX.XX.XX.XX 607
remote XX.XX.XX.XX 1188
Where XX.XX.XX.XX is IP address of an incoming server of a VPN chain. Enter this IP to the field Server IP/Name. Also there are a connection ports in the lines: 607 and 1188. Choose one and enter to the Port field. Select TUN in the Tunnel Device, Tunnel Protocol – TCP, Encryption Cipher – AES-256 CBC, Hash Algorithm – SHA1.
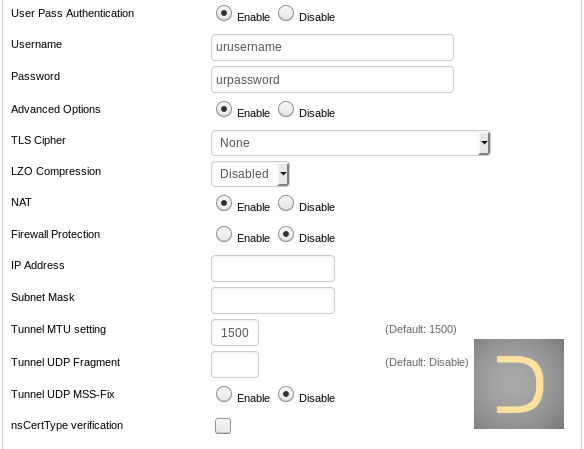
The username and password are the same as the username and password of the DeepWebVPN Cabinet.
Set Advanced Options as Enable and select None in the TLS Cipher field, LZO Compression – Disabled. Leave the other fields as they are.
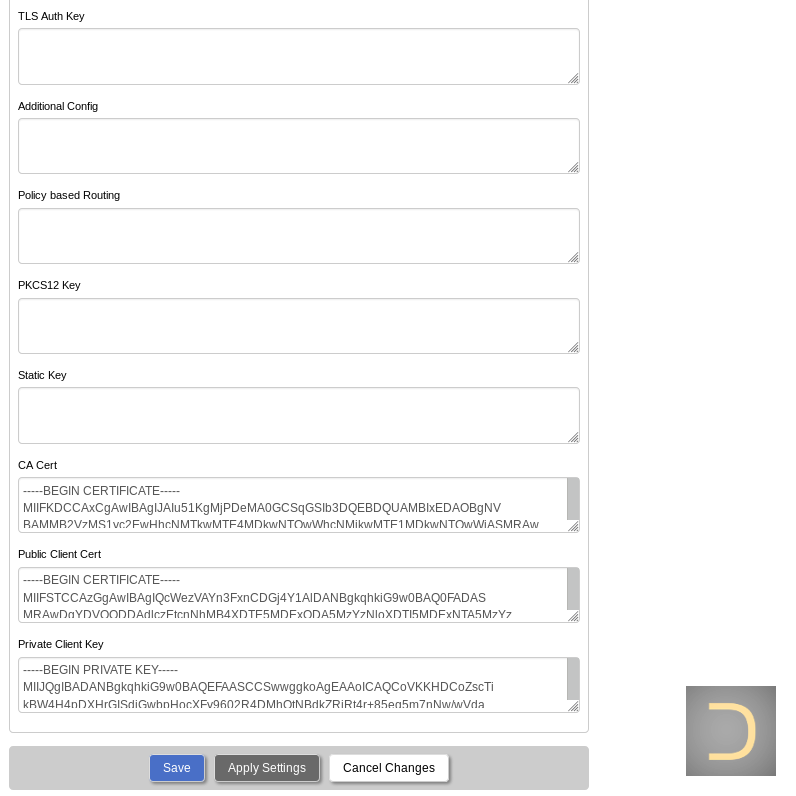
<ca>
-----BEGIN CERTIFICATE-----
MIIFKDCCAxCgAwIBAgIJAIu51KgMjPDeMA0GCSqGSIb3DQEBDQUAMBIxEDAOBgNV
...
OEmb/bMFNm5iiRex+RbXOu0JoQEgmUAZ3mTkYoVmZY0uXCaUYOz/E0qBFUUwsFKB
WbbR
-----END CERTIFICATE-----
</ca>
<cert>
-----BEGIN CERTIFICATE-----
MIIFSTCCAzGgAwIBAgIQcWezVAYn3FxnCDGj4Y1AlDANBgkqhkiG9w0BAQ0FADAS
...
aZ3Np8+amkfkBS6sqjdhthi2maAnloYsWxNpdZlhEuPJlWSQ8jeDUPwqgtdU+Lgx
JJf2SQSUOtJtjo+H4l7j4NbdWoRrRPIEKA==
-----END CERTIFICATE-----
</cert>
<key>
-----BEGIN PRIVATE KEY-----
MIIJQgIBADANBgkqhkiG9w0BAQEFAASCCSwwggkoAgEAAoICAQCoVKKHDCoZscTi
...
QD9xaa0o8oBsyES8VwNKCp6tCE5xSSK6+afb4ZeZhqldR8eWTgppHxmeIJknw/Np
DhMoAPhxnhs7g0/Cwgfbvu8+5kZNxU==
-----END PRIVATE KEY-----
</key>
Copy and paste the content between <ca> and </ca> to the field CA Cert. Between <cert> and </cert> to Public Client Cert, <key> and </key> – Private Client Key.
3. Log of OpenVPN client
The log of OpenVPN client in DD-WRT is in the tab Status -> OpenVPN. A successful connecting has the State Client: CONNECTED SUCCESS in the log.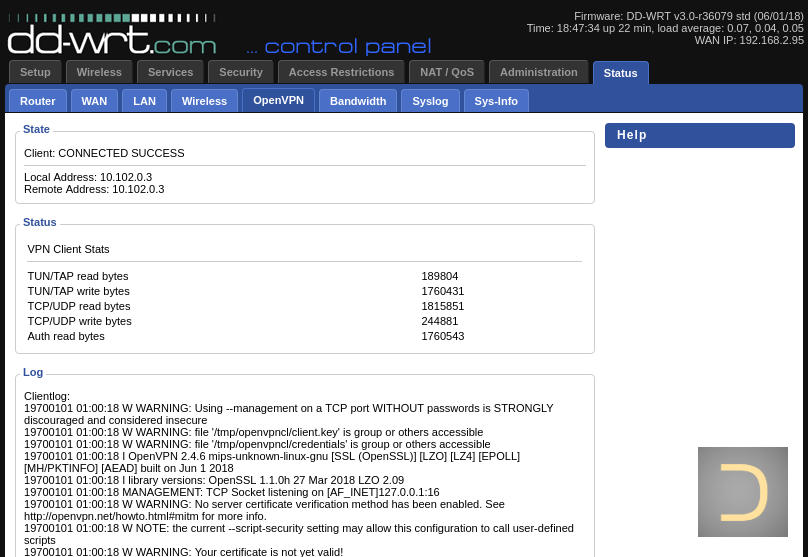
4. Setting DNS in DD-WRT
The list of DeepWebVPN DNS servers is available on the subscription page.
DeepWebVPN DNS servers are working if you are connected to the DeepWebVPN VPN network only. Use another DNS servers for correctly working of the Internet if you are not connected to the DeepWebVPN VPN network.
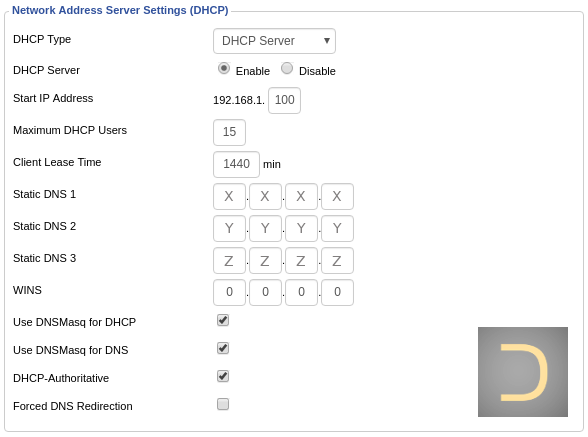
It is important to set DNS from the DeepWebVPN after the successful connecting. Go to the tab Setup -> Basic Setup and enter the most suitable DNS servers for your VPN chain in the fields Static DNS 1, Static DNS 2 and Static DNS 3 in the subitem Network Setup -> Network Address Server Settings (DHCP).